How to make a Glass Bong
How to make a Glass Bong
Glassblowing is a technique for making glass that dates back to the 1st century BC. While the industrial age streamlined many handmade processes and resulted in a more efficient output and uniform quality, the craft of glassblowing has remained much the same to the present day.
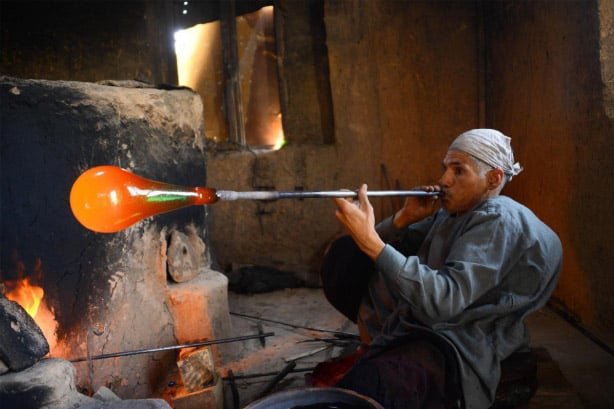
This free-blowing technique involves gathering the molten glass onto a hollow blowpipe.
Air is blown down the pipe into the heated glass producing a bubble or parison. The blowpipe would be rotated quickly in the hands and rolled to keep symmetry in the shape of the glass.

Image: chinadaily.com.cn
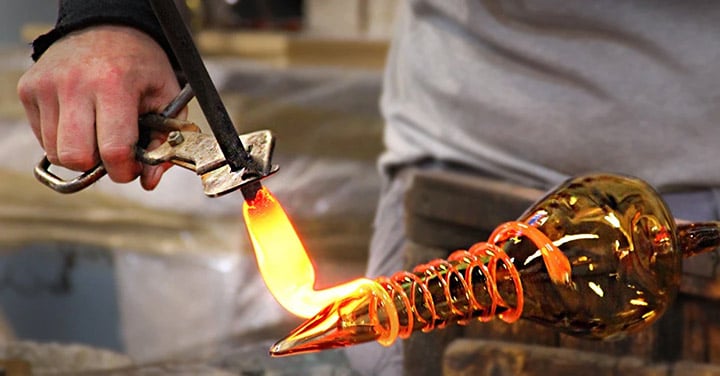
Of course, today, we have the benefits of blowtorches, lathes, and other modern tools to aid in this free-blowing technique.
Lathe Spun Versus Hand Spun Glass
While much glass is made by the hand-spun method, lathe spun has become common, especially for the larger pieces and big producers. The turning speed control provided by the lathe helps keep the seizing and sharp lines consistent. That and the thick glass with well-balanced bases are some of the main features of lathe spun glass.
A good quality lathe can cost many thousands of dollars to buy and use a good amount of energy. Of course, on top of the high initial cost and price, to run a lathe takes up extra room in a glassblowing studio. This all adds to the overheads, which is often reflected in the price for well-made lathe worked glass.
Hand-spun glass is cheaper than working with a lathe, which is why hand-spun glassmakers are more common.
The hand-spun glass tends to have simpler diffusion than the intricate percolators found on many lathe-made scientific glass bongs.
With hand-spun glass, the angles tend to be rounder, and pieces are often smaller and may not always be perfectly straight. However, this inconsistency in form makes every piece unique, which itself can be desirable. Good artists can hand spin some beautiful-looking pieces, which can fetch high prices, and this more artisan approach can lead to some stunning rare heady glass.

How to make a glass beaker bong
While much of the glass made by Lookah is relatively complex with percolators and recyclers for simplicity, in this article, we will describe how we make the straight neck beaker bongs that take the shape of an Erlenmeyer flask.
Rather than starting from a molten ball of glass, we begin this process with a cylindrical pipe of high-quality borosilicate glass.
The glassblower scores the borosilicate glass pipe and adds a little water to the scored mark. They then heat a glass rod until the end is glowing and molten. Finally, the glassblower presses the hot rod to the end of the score mark. The resulting transfer of heat expands down the score mark, which effectively cuts the tube in two.
Making the Mouthpiece End
The bong maker will mount the tube into a lathe, ensuring that it heats uniformly, guaranteeing a consistent shape.
As the glass spins, a large bunsen burner sat under it evenly heats the glass. Then, as the end of the glass gets hotter, the bong maker moves the bunsen burner further away from the working end, so it sits between the cooler end of the glass in the grip of the lathe and the working end.
This heat in the middle of the pipe helps reduce the temperature difference and minimizes stress on the glass as it's worked.
Shaping the Mouthpiece
With a focused annealing flame, the very end of the pipe is heated by the glassworker until it is glowing hot. They will make this into a beaded lip, the mouthpiece at the top of the beaker bong. Next, they use a graphite rod to gently pushed against the hot end of the glass. As the tube spins, the graphite pressing against it uniformly shapes the beaded end helping to turn the end of the glass pipe into a thick ring.

As they want the glass to remain the same diameter, the glassworker uses a graphite rod on the flat end of the glass and inside and outside of it. They press it gently to shape and build up the beaded ring of glass.
Having made the mouthpiece end, the glassworker leaves the tube to cool down before flipping it around in the lath so they can make the bottom of it.
Making the Beaker End
The glass will be measured and marked off where they want the neck to start. This marked work area should be well spaced from the metal chucks of the lathe, allowing ample room to work without heating the metal chucks, which would put pressure on the glass and possibly crack it.
Both ends of the pipe will be in chunks of the lathe. The tailstock is needed to support the bottom end of the glass pipe. The area in the middle is to create the Erlenmeyer flask shape.
The glassblower places a rubber stopper at each end of the glass pipe. The mouthpiece stopper will have a hole through it into which they place an air pipe. This air pipe allows them to blow air into the glass to help shape it later.
Beaker End
As the lathe spins, the glassblower evenly heats the working area with a bunsen burner and torch. Then, as they puff out an area, they move the flame away and notch in the tailstock a little. Pulling in the tailstock maintains the thickness of the glass as the air blown into the tube pushes the sides out.
They then reapply the heat around the bubble, ensuring they keep it hot and mailable where they want the bubble to grow. Then as the glassblower puffs air into the glass, they move in the tailstock of the lathe again.
By repeating this process, the glassblower can shape the bubble forming in the glass pipe.
Then, after the right-sized Erlenmeyer flask shape starts to take place, they can focus the heat on the very bottom edge of that bubble where they want to remove the excess tube.
Using the same graphite pipe as before and a focused annealed flame, the glassblower, superheats the glass pipe below the flask shape and tools it down to a flat bottom. The tailstock is slowly notched away, pulling the excess glass tube with it.
Using a glass punty rod, they can pull away any excess glass on the bottom of the bong, and the small bump where the excess pipe was pulled away can be smoothed out with some focused heat. By steadily applying a wide flame and a large paddle to the bottom of the glass, the glassblower can now flatten out what will be the base of the bong so it will sit nice and flat and won't topple over when stood up. They will then place the glass on a hot marvering pad (a graphite or steel plate) to test the base is level before putting it into a kiln for annealing glass called a lehr.
Adding the Joint to the Bong
After measuring the glass joint at an angle of about 45 degrees and checking it against the downstem length, the glassworker can use a wet saw to cut the joint to size. Once cut, they can clean up the joint, washing away any swarf or glass filings.
The wet saw will have left a rough surface on the glass pipe, so the glassworker will need to heat the rough edge of the joint pipe and use a glass punty rod to pick that out. This allows them to make a smooth seal when adding the joint to the side of the flask.
The glassblower will heat a point on the flask with a focused torch where the joint will be attached. Then, with the right area glowing hot, they can blow into the bong, which will force the heated area to bubble outwards. The glassblower can pick this open with a glass rod and fold the edges of it back, making a hole into the side of the flask.
To make the seal, the joint and the opening in the flask have to be red hot. Then, the glassblower can work the joint to make sure it's at the right angle for the downstem to go into the beaker and sit well below the water level. Once they have the joint attached and sealed in place, they will return the bong to the lehr.
This article focused on making a beaker bong but we hope it has also given you some insight into glassblowing and the skill glassblowers need.
Other than the straight tube bong the beaker bong is one of the simpler water pipes to make. However, the skill and time needed to make some of the more complex bongs and dab rigs with their intricate pipes and artistic colorful designs is considerable. At Lookah we are fortunate to have over 300 skilled artisans working to make all our glass pipes, bongs, and dab rigs in-house. We hope you will enjoy using these water pipes they make as much as we enjoy designing and making them for you.
