How to Make a Glass Pipe?
How to Make a Glass Pipe

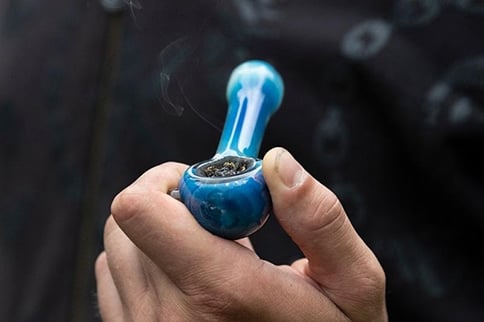
Hand pipes are everyone's favorite beginner's piece. They are retro, convenient, easy to clean, and affordable; As for the basic smoking apparatus, they were always reliable. Their simplicity makes it easy to overlook the question of how we make them, but if you're curious about this sort of thing, the answer is more interesting than it looks.
It takes skilled glassblowers to make smooth, uniformly sized pipes with an excellent airway for easy smoking. Sure, these pieces are easier to make than water pipes or heady glass rigs, but they still require attention to detail and a well-trained, steady hand.
There are many ways to make glass hand pipes, but here are the common steps.
Making Glass Hand Pipes

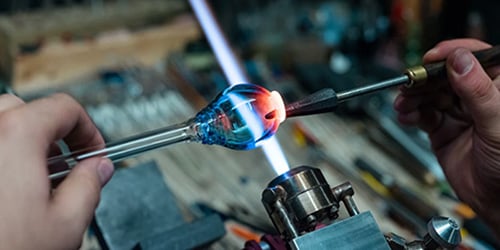
As with any other glass piece we make, making a glass hand pipe begins with a glass tube. This glass tube is heated in the center to form a rounded bulbous part about 3-4 inches (depending on the desired size of the pipe), which is then pinched together in the middle.
The two parts are separated from each other by heating and slightly twisting so that they come apart and can be made into two separate pieces, This is a trick to saving time and avoiding waste glass material.
Each piece is then sealed separately by heating and smoothing the end.
Some glassblowers may prefer to make just one bowl per tube, as the extra glass at each end makes the glass easier to handle, but as we make so many of these, it's much more economical for the Lookah glassworkers to do them this way, two at a time.
Glassblowers place the piece on a block that shapes the softened glass, thus thinning the part that separates the bowl from the stem.
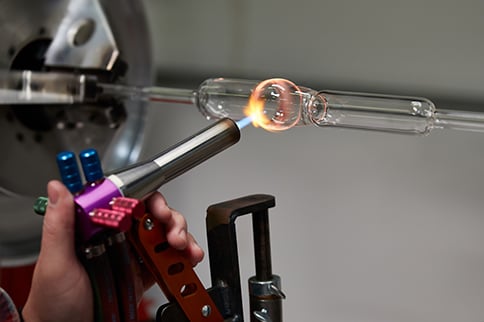
Unlike our Lookah scientific glass or Tataoo dab rigs, the glass hand pipes or spoons are turned by hand rather than on the lathe. It is this process that gives them their often more organic look.
Shape the pipe

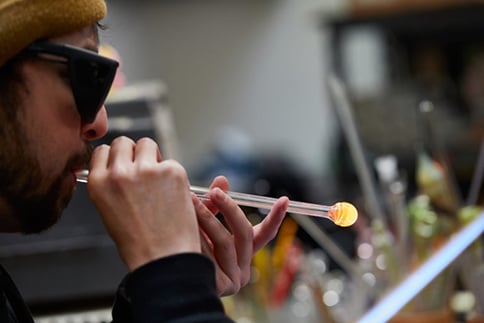
Here the glassblower shapes the mouthpiece of the tube by blowing some air into the heated body, making the end of the bowl expand and become more spherical. The glassblower must ensure that the glass spins evenly. They need to keep the wight entered to prevent the designs from becoming skewed or having an uneven thickness.
Form a bowl
The glass is put flat on a table to make the bowl. Using a carbon rod, the glassmaker performs a "bowl push," which, as the name suggests, creates the dished space to place the herb which will be smoked from the pipe.
While the glass is still glowing hot, the glassmaker needs to quickly punch a hole in the bottom of the bowl with a sharp tool that opens the path the smoke will pass through to the mouthpiece end.
Using a torch, the glassmaker will heat the outer part of the glass where the bowl has just been made. By blowing in a bit of air from the other end, this softer glass will expand.
This can be opened into a hole making the bowl's carb.
After this, the bottom of the bowl is flattened to make sure it doesn't tip over when placed on a surface.
Form the mouthpiece
The mouthpiece end of the glass needs to be heated and spun to melt away any unevenness.
Annealing
Finally, the glass is annealed, removing the thermal stress on the glass produced during the glass blowing process. Unannealed parts can break under temperature changes -- which is not a problem you want to have when heating a bowl right in front of your face.
Making decorative glass pipes.
The flare method

This process, while perhaps the most traditional, is not the only option for making glass tubes.
There's also the inside-out flare method, a popular option for those who want to trace designs in the pipes and create the iconic swirly spoons that are so very popular.
Using this method, the bowl is created from the end of the glass tube, not in its center, lighting it and blowing through the handle to create an open bulb. The glassblowers use straight tweezers called jacks to rotate the parts while straightening the wall of the bulb into a cylinder and eventually into a flared funnel.
Precise torch
Using a precise flame, the glassmaker can then use a stained glass cane to place details such as wavy lines into the bowl to give it extra character. The decorated bowl is heated, rolled back into a cylindrical shape on a flat plate, and then clamped with a jack until it returns to its original oval bulb. Using a blowpipe, the glassmaker shapes the pipe by heating the center, blowing into the fitting, and twisting it so that it begins to take on the familiar spoon shape.
There are many other methods to decorate and create exciting designs on the pipe. Decorative pendants can be added, or coloring can be made through fuming.
Other design methods include dichro, striping, wrap and rakes, caning, latticino, latticello, reticella, or the use of millefiore or murrine techniques.
The final step
As with other spoon production methods, the glass manufacturer then uses a glass handle to blow into the end of the part until it forms a sphere that fits the bowl. The bowl is heated and pushed, flattening the bottom of the tube and stamping the carbohydrates. The handle is removed, the bowl is annealed, and voila! An ornamental glass bowl was born.
