How To Make A Pumpkin Bong
How To Make A Pumpkin Bong

Halloween is almost here, and the first thing that comes to mind is pumpkins.
It's at this time of year we grab some pumpkins, those ubiquitous autumn gourds, and carve some spooky jack-o '-lantern.
The insides need not go to waste as you can make delicious snacks by drying and baking the seeds and turning the orange flesh of this vegetable into a healthy, tasty soup to keep you warm on a chilly autumnal night. Or you can process the innards to make a delicious pumpkin pie.
But really, the scariest thing you can do with your pumpkin this Halloween is carving it into a super frightening pumpkin bong.
Making pumpkin bong will help take your Halloween experience to the next level. If you are not sure you can do this, don't worry, we have developed the best guide to making a pumpkin bong that's easy to follow.
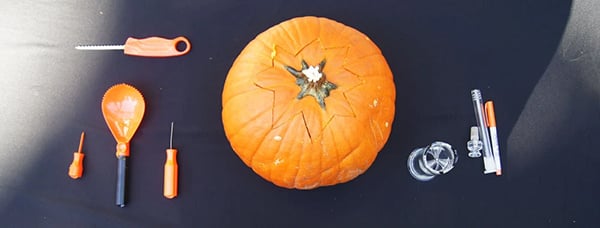
What do you need to prepare?

· Sharpie
· A Bad-Ass Pumpkin
· Glass Downstem
· Bowl Piece
· For a professional touch, use the down-stem from your bong if you have one handy.
· Knife (or another carving tool)
· Spoon
Find the right pumpkin.
It would be best to prioritize height over roundness, as there has to be enough room for the mouthpiece and a downstem.
When you get to the pumpkin patch, imagine having to add these pieces to your pumpkin and leave plenty of room. Keep in mind that bigger pumpkins will have a larger capacity and, as such, will be harder to smoke. So don't overdo it and get the largest pumpkin you can find.
Mark out where your cuts will go.
Before taking any permanent steps, you should mark out where your cuts will go, like making a blueprint. Don't try to wing it! Use your Sharpie to mark the following positions on the pumpkin. Pick up the pumpkin and try to figure out where the most comfortable place to put your mouth and flower bowl will be so you can smoke it easily.
· Downstem hole: The downstem hole should be on the side of the pumpkin at a 45-degree angle to the bottom of the pumpkin.
· Mouthpiece hole: The mouthpiece should be located on top or close to the top of the pumpkin.
· Pumpkin top: The cut at the top of the pumpkin should be wide enough so that you can effectively clean the pumpkin, but not so broad that it interferes with the hole in the mouthpiece or under the stem. The top should sit tightly in place to make a good seal when the pumpkin bong is used.
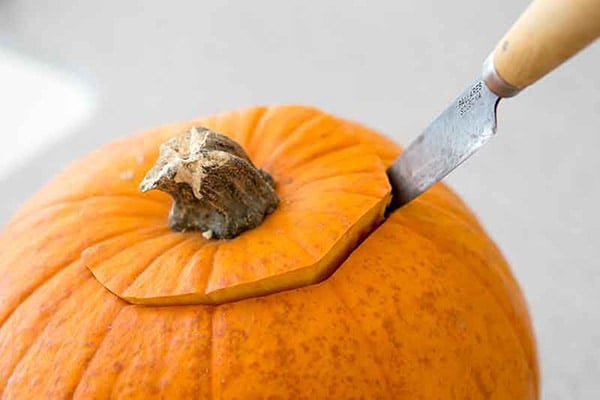
Cut the top of the pumpkin.

Using a very sharp knife, follow the markings to cut out the top of the pumpkin. Be sure to keep the top intact. Also, be careful to avoid cutting into the downstem or mouthpiece area. You want to maintain as clean a seal as possible, so take your time.
You can use a zigzag pattern to cut out the top. However, we found that a single circular incision minimizes the surface area of the incisions and has less air exposure so that it can create a better seal.
Scoop out the inside of the pumpkin
After removing the top, use a spoon to "gut" the pumpkin. Remove the seeds and make a sound size chamber in the pumpkin, but don't remove all the flesh as you'll need some to hold the downstem and flower bowl in place.
You can keep the pumpkin flesh you scoop out to make a pie or soup later. If you follow our method for making canna oil, you can even infuse your Halloween food with cannabis.
To clean it thoroughly, rinse the inside of the pumpkin with water.
Don't forget to trim the flesh of the pumpkin top! But do this slowly and make sure the top makes a good seal when in place.
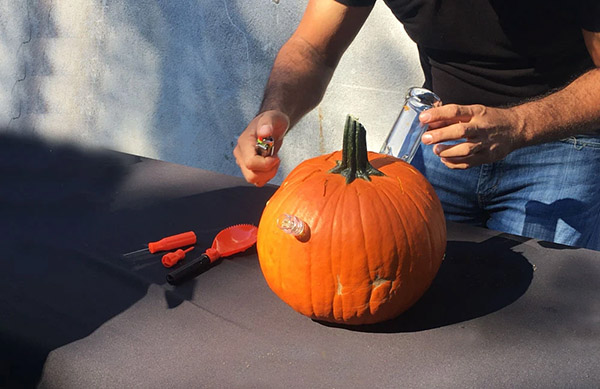
Install downstem/bowl
It is essential to do this step very carefully. The bowl and downstem need to have a tight fit. If it's too loose, you'll suck air and won't get a good hit.
We used a knife, but you could also do this step with a drill bit or a screwdriver.
Keep the top of the pumpkin off while doing this step to see where the blade enters into the pumpkin making sure you don't puncture the bottom.
Cut out the designated area for the downstem, but keep the lower part of the hole at a 45-degree angle.
This will keep the downstem facing down and prevent splashback. Put the downstem into the hole. Finally, place the bowl at the end of the lower level.
Fit the mouthpiece
If you haven't already done so, replace the top of the pumpkin. Next, use a knife tool to carve the mouthpiece hole into the pumpkin. Then, put the mouthpiece into the hole.
You can also use a straw instead of a mouthpiece. In this case, you'll need to use a smaller tool (such as a screwdriver) to Pierce the pumpkin.
Add water
Add a small amount of water for the smoke to flow more smoothly. If you want the pumpkin to be more like a bowl or dab device, you can skip the water.
Optional: Decorate the exterior
While it won't improve the smoking quality decorating your pumpkin is always fun.
Using a permanent marker, create a design that says fall or Halloween!
Do not cut a jack-o '-lantern-like a regular jack-o' -lantern, as this will cause the smoke to escape.
Completed
You have successfully made a pumpkin bong to be proud about.
Show off your Halloween masterpiece at parties and share some Halloween sessions with your buddies. Remember to rinse the water out after every use, or your pumpkin bong will get dank very fast.
You have now learned how to master the ancient and outstanding art of pumpkin bong creation!
If all this seems a little too much effort, you can visit our Lookah webpage and snap up some spooky glass or vapes and save 20% off this Halloween.
Check out our mega Halloween promotions for more information.

